I have been researching my family genealogy since the early
1990’s. As you can imagine I have
gathered a mountain of documents, photographs and other family memorabilia. All of which requires organization of some
kind. Over the years I have had many, many
filing systems, but none was ever quite sufficient for my needs and data
retrieval.
Last year I converted to a color coded system for all my
paper hard copy records and let me tell you………….what a HUGE difference it has
made in my genealogical research!! I can
now easily find data I need when I need it and I can easily and quickly file
any new data and documents I discover. I also have a computer filing system which I
will discuss in a later post.
The purpose of this step by step post is to explain how my paper
system works in hopes that it could help other genealogy hobbyist to get their paper
documents and data into a streamlined organization system.
Step One: Assign colors
I assigned a color to each of my four grandparents, my
step-father’s family, and each of my husband’s four grandparents.
v My Maternal Grandfather is Blue
v My Maternal Grandmother is Red
v
My Paternal Grandfather is Green
v
My Paternal Grandmother is Yellow
v
My Step-father is Cream
v
My husband’s Maternal Grandfather is Purple
v
My husband’s Maternal Grandmother is Burgundy
v
My Husband’s Paternal Grandfather is Dark Blue
v
My husband’s Paternal Grandmother is Aqua
Step Two: Gather Supplies

v
You will need colored file folders and colored
hanging file folders in each of the colors you have chosen to represent your
ancestors.
v
Large plastic file storage box
v
File Folder Labels. You can purchase labels with a colored line
across the top in Red, Yellow, Blue & Green. Or simply use plain white
labels.
v
One binder for each of your color coded ancestors.
I prefer the binders where you can slip a paper in the cover and spine. If you are color coding just your four
grandparents, then you will only need four binders. Because I have color coded my step-family and
my In-Laws I have a total of nine binders.
v
Binder dividers with clear non-colored tabs. One
8-10 sheet set for each of your binders.
v
Colored circle labels. Both large and small. You can purchase
packages of primary colors (Red, Blue, Yellow & Green), our purchase just
plain white circle labels and color in yourself. I did this with the other
colors I chose to represent my step-family and in-laws.
v
Sharpie pens in all the colors you have chosen
to represent your ancestors.
v
Pencil and blue/black pen
v
Stapler
v
Genealogy forms: Individual Record Sheet,
Pedigree Charts, Family Group Record Sheets
v
Colored construction/card stock paper (optional)
v
Index cards (size of your choice)
v
Index card storage box
v
Alphabetical dividers for the index card storage
box
Step Three: Assemble File Folder Box

v
Start by putting the hanging folders into your
box keeping like colors together
v
Starting with the colored file folders you have
chosen to represent your Maternal Grandfather; place a label onto each file
folder.
v
Write the name of your Maternal Grandfather on
one folder and place into your box.
Write the name in a Last, First Middle format.
v
Continue writing the names of each ancestor
connected to you through your Maternal Grandfather on each of the folders in
the color representing you Maternal Grandfather.
v
Continue the above steps for each of your other
three grandparents until you have a folder for each known ancestor.
Step Four: Fill your folders


v
Starting with your Maternal Grandfather’s file;
staple an Individual Record Sheet to the inside left cover of the folder
v
Fill out the Individual Record Sheet with
detailed information about your Maternal Grandfather.
v
Using your colored circle labels; place a
colored sticker on ALL documents you have pertaining to your Maternal
Grandfather (birth record, census records, marriage records ect). I place the sticker in the lower right corner
of all documents. If you don’t want the sticker on the front of the document,
place it on the back.
v
Place all the documents into the folder with
your Maternal Grandfather’s name
v
You will continue this process for each ancestor
who you have created a file folder for being sure to place an appropriate
colored circle on each document before placing it into a file folder.
Step Five: Assemble your Ancestor Binders

v
Using your colored card Stock/construction
paper, make a cover and spin label for each of your four binders using the
colors you have chosen for each of your four grandparents. You can also create a cover using a word
processing program on your computer.
v
Place one set of binder dividers into each
binder
v
Label each divider with a surname connected to you
through your Primary Ancestor. For
example the surnames connected to me through my Maternal Grandfather are
Bestor, Cyrier, Savoie, Hubbard, Chartier, and Force. I place the labels in my binder in order by
generation. Therefore the Surname at the beginning is my Grandfather’s, then
his parents, then their parents and so on.
v
In each Surname labeled section place your
Family Group Record sheets. I make two
copies of each family record so I have one filed under the husbands Surname and
one filed under the wife’s surname. I highlight with a yellow highlighter which
person it is filed under (Husband or Wife). Within each section I file
alphabetically by first name, then middle.
v
In each Surname section I have a running
Document Log for each ancestor in that surname.
This allows me to quickly see what documents I have for an individual
and what ones I still need to do research on.
v
Within each Surname section I have a subsection
labeled “Maps” This is where I place all maps pertaining to the locations of
residence for that surname.
o
I write on each map the first and last names of
the ancestor it belongs to
Step Six: Assemble your Index Cards
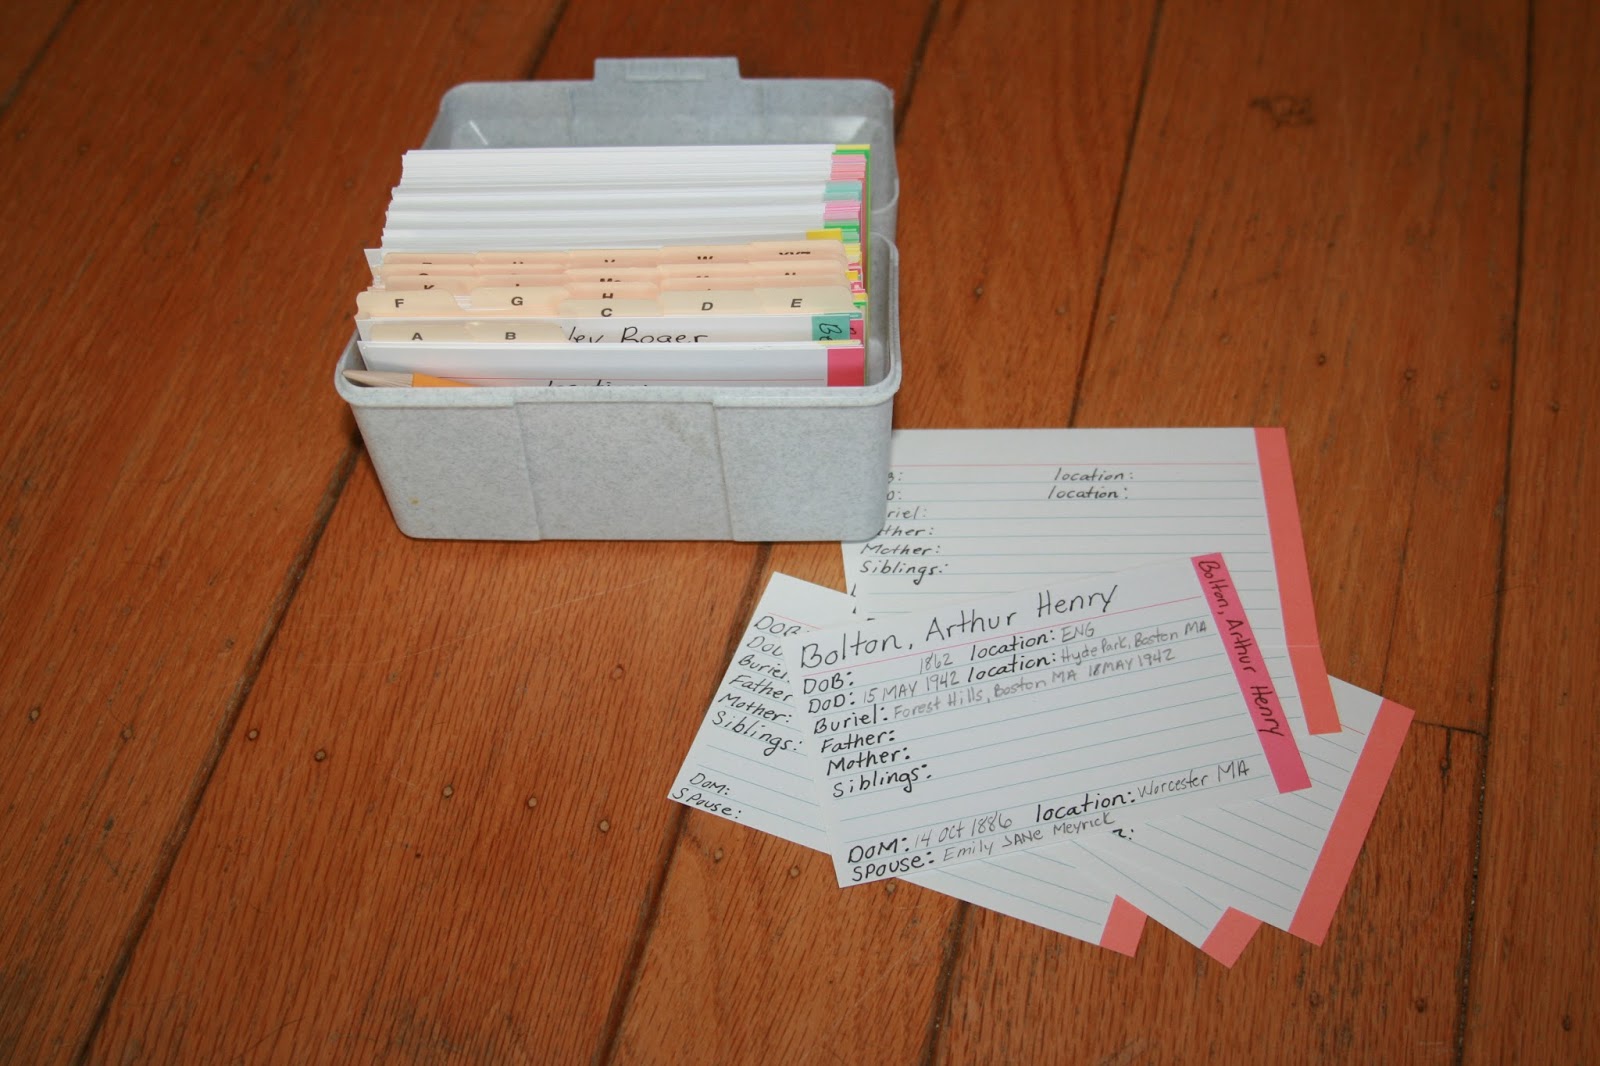
Note: I keep my
index card file box next to my computer for easy access when I’m researching
online.
v
On the top line of each index card write the
full name of your ancestors (one card per ancestor) in a LAST, First, Middle
format
v
On the index card, write that ancestors’ vital
information: Birth date and Location; Death Date and Location; Marriage date
and Location. Parents names, Spouses name, children’s names, siblings names;
Burial information; Occupation ect. Use both sides of the index card.
v
In the upper right corner of each card place a
color coded sticker indicating which Primary Ancestor connects you to the
ancestor named on the card. For my four
grandparents I was lucky enough to find index cards with a colored strip on the
top that matched the colors I had chosen for each of them.
v
File alphabetically in your index card storage
box by Surname-----First name----- Middle Name
As I stated above, I started using this system about a year
ago after years of using various other filing systems…..by document type, by
surname ect, and truly LOVE my color code system. I am able to quickly find information and I
know immediately how each ancestor is connected to me with a simple
glance. I will never file my paper
genealogy documents any other way!!


